Exercise - Add a controller
A controller is a public class with one or more public methods known as actions. By convention, a controller is placed in the project root's Controllers directory. The actions are exposed as HTTP endpoints inside the web API controller.
qa testing training courses malaysia
Create a controller
Select the Controllers folder in Visual Studio Code and add a new file called PizzaController.cs.
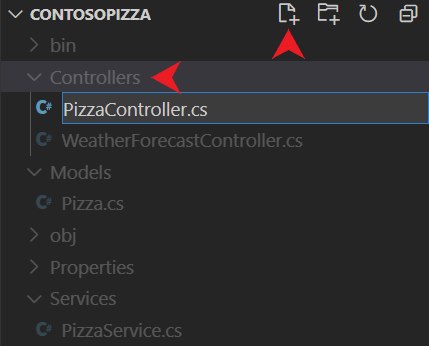
An empty class file named PizzaController.cs is created in the Controllers directory. The Controllers directory name is a convention. The directory name comes from the model-view-controller architecture that the web API uses.
Note
By convention, controller class names are suffixed with Controller.
Add the following code to Controllers/PizzaController.cs. Save your changes.
C#using ContosoPizza.Models; using ContosoPizza.Services; using Microsoft.AspNetCore.Mvc; namespace ContosoPizza.Controllers; [ApiController] [Route("[controller]")] public class PizzaController : ControllerBase { public PizzaController() { } // GET all action // GET by Id action // POST action // PUT action // DELETE action }As you learned previously, this class derives from
ControllerBase, the base class for working with HTTP requests in ASP.NET Core. It also includes the two standard attributes you learned about:[ApiController]and[Route]. As before, the[Route]attribute defines a mapping to the[controller]token. Because this controller class is namedPizzaController, this controller handles requests tohttps://localhost:{PORT}/pizza.
Get all pizzas
The first REST verb that you need to implement is GET, where a client can get all pizzas from the API. You can use the built-in [HttpGet] attribute to define a method that returns the pizzas from our service.
Replace the // GET all action comment in Controllers/PizzaController.cs with the following code:
[HttpGet]
public ActionResult<List<Pizza>> GetAll() =>
    PizzaService.GetAll();
The preceding action:
- Responds only to the HTTP
GETverb, as denoted by the[HttpGet]attribute. - Returns an
ActionResultinstance of typeList<Pizza>. TheActionResulttype is the base class for all action results in ASP.NET Core. - Queries the service for all pizza and automatically returns data with a
Content-Typevalue ofapplication/json.
Retrieve a single pizza
The client might also want to request information about a specific pizza instead of the entire list. You can implement another GET action that requires an id parameter. You can use the built-in [HttpGet("{id}")] attribute to define a method that returns the pizzas from our service. The routing logic registers [HttpGet] (without id) and [HttpGet("{id}")] (with id) as two different routes. You can then write a separate action to retrieve a single item.
Replace the // GET by Id action comment in Controllers/PizzaController.cs with the following code:
[HttpGet("{id}")]
public ActionResult<Pizza> Get(int id)
{
    var pizza = PizzaService.Get(id);

    if(pizza == null)
        return NotFound();

    return pizza;
}
The preceding action:
- Responds only to the HTTP
GETverb, as denoted by the[HttpGet]attribute. - Requires that the
idparameter's value is included in the URL segment afterpizza/. Remember, the controller-level[Route]attribute defined the/pizzapattern. - Queries the database for a pizza that matches the provided
idparameter.
Each ActionResult instance used in the preceding action is mapped to the corresponding HTTP status code in the following table:
| ASP.NET Core action result | HTTP status code | Description |
|---|---|---|
Ok is implied | 200 | A product that matches the provided id parameter exists in the in-memory cache.The product is included in the response body in the media type, as defined in the accept HTTP request header (JSON by default). |
NotFound | 404 | A product that matches the provided id parameter doesn't exist in the in-memory cache. |
networking training courses malaysia
Build and run the new controller
Build and start the web API by running the following command:
dotnet run
Test the controller with an Http file
Open ContosoPizza.http
Add a new GET to call the
Pizzaendpoint under the ### seperator:OutputGET {{ContosoPizza_HostAddress}}/pizza/ Accept: application/json ###Select the Send Request command above this new GET call.
The preceding command returns a list of all pizzas in JSON:
OutputHTTP/1.1 200 OK Connection: close Content-Type: application/json; charset=utf-8 Date: Wed, 17 Jan 2024 16:57:09 GMT Server: Kestrel Transfer-Encoding: chunked [ { "id": 1, "name": "Classic Italian", "isGlutenFree": false }, { "id": 2, "name": "Veggie", "isGlutenFree": true } ]To query for a single pizza, you can make another
GETrequest, but pass in anidparameter by using the following command:OutputGET {{ContosoPizza_HostAddress}}/pizza/1 Accept: application/json ###The preceding command returns
Classic Italianwith the following output:OutputHTTP/1.1 200 OK Content-Type: application/json; charset=utf-8 Date: Fri, 02 Apr 2021 21:57:57 GMT Server: Kestrel Transfer-Encoding: chunked { "id": 1, "name": "Classic Italian", "isGlutenFree": false }Our API also handles situations where the item doesn't exist. Call the API again, but pass in an invalid pizza
idparameter by using the following command:OutputGET {{ContosoPizza_HostAddress}}/pizza/5 Accept: application/json ###The preceding command returns a
404 Not Founderror with the following output:OutputHTTP/1.1 404 Not Found Content-Type: application/problem+json; charset=utf-8 Date: Fri, 02 Apr 2021 22:03:06 GMT Server: Kestrel Transfer-Encoding: chunked { "type": "https://tools.ietf.org/html/rfc7231#section-6.5.4", "title": "Not Found", "status": 404, "traceId": "00-ec263e401ec554b6a2f3e216a1d1fac5-4b40b8023d56762c-00" }
Now that you finished implementing the GET verbs. In the next unit, you can add more actions to PizzaController to support CRUD operations on pizza data.
project management training courses malaysia
Optional: Test the controller with Command Line HTTP Read-Eval-Print Loop (REPL)
Open the existing
httpreplterminal, or open a new integrated terminal from Visual Studio Code by selecting Terminal > New Terminal from the main menu.Connect to our web API by running the following command:
.NET CLIhttprepl https://localhost:{PORT}Alternatively, run the following command at any time while
HttpReplis running:.NET CLIconnect https://localhost:{PORT}To see the newly available
Pizzaendpoint, run the following command:.NET CLIlsThe preceding command detects all APIs available on the connected endpoint. It should display the following code:
Outputhttps://localhost:{PORT}/> ls . [] Pizza [GET] WeatherForecast [GET]Go to the
Pizzaendpoint by running the following command:.NET CLIcd PizzaThe preceding command shows an output of available APIs for the
Pizzaendpoint:Outputhttps://localhost:{PORT}/> cd Pizza /Pizza [GET]Make a
GETrequest inHttpReplby using the following command:.NET CLIgetThe preceding command returns a list of all pizzas in JSON:
OutputHTTP/1.1 200 OK Content-Type: application/json; charset=utf-8 Date: Fri, 02 Apr 2021 21:55:53 GMT Server: Kestrel Transfer-Encoding: chunked [ { "id": 1, "name": "Classic Italian", "isGlutenFree": false }, { "id": 2, "name": "Veggie", "isGlutenFree": true } ]To query for a single pizza, you can make another
GETrequest, but pass in anidparameter by using the following command:.NET CLIget 1The preceding command returns
Classic Italianwith the following output:OutputHTTP/1.1 200 OK Content-Type: application/json; charset=utf-8 Date: Fri, 02 Apr 2021 21:57:57 GMT Server: Kestrel Transfer-Encoding: chunked { "id": 1, "name": "Classic Italian", "isGlutenFree": false }Our API also handles situations where the item doesn't exist. Call the API again, but pass in an invalid pizza
idparameter by using the following command:.NET CLIget 5The preceding command returns a
404 Not Founderror with the following output:OutputHTTP/1.1 404 Not Found Content-Type: application/problem+json; charset=utf-8 Date: Fri, 02 Apr 2021 22:03:06 GMT Server: Kestrel Transfer-Encoding: chunked { "type": "https://tools.ietf.org/html/rfc7231#section-6.5.4", "title": "Not Found", "status": 404, "traceId": "00-ec263e401ec554b6a2f3e216a1d1fac5-4b40b8023d56762c-00" }Return to the
dotnetterminal in the drop-down list in Visual Studio Code and shut down the web API by selecting CTRL+C on your keyboard.
Now that you finished implementing the GET verbs. In the next unit, you can add more actions to PizzaController to support CRUD operations on pizza data.

Comments
Post a Comment